Editing an audio file with PowerPoint

Many people use PowerPoint to create presentations and many people also use audio files with their presentations but editing an audio file in PowerPoint can be a difficult task, although with the right tools and techniques, it is possible to use the program to edit any type of audio file and save it to the computer.
This article will guide you through the steps necessary to edit the audio files that PowerPoint supports (mp3 - wav - wma - mp4 - midi - flac - au - aiff - adts), before starting the steps, make sure to locate the audio file you want to modify in your computer or you can download audio files from the sites that provide them (Click here to go to a list of the best sites) .
To see how this works, you can watch Video If you prefer to read, you can skip the video and follow the steps below:
Audio Truncation
How to insert an audio file into a PowerPoint program

How to edit an audio file and save it to your computer

- To truncate the beginning of the clip, click the green marker on the left side and when the cursor turns into a double-headed arrow, drag it to the new starting position of the audio clip.
- To truncate the beginning of the clip, click the red marker on the right side and when the cursor turns into a double-headed arrow, drag it to the new starting position of the audio clip.

- Select File > Info.
- Select Media Compression, then choose the appropriate compression level.

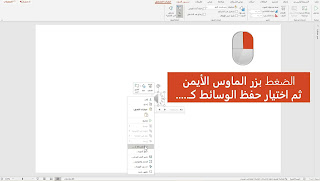
- When the compression is done, select the audio clip on the slide and then Right-click Above it and select Saving media K..

- Enter the name and storage location of the audio file on the computer, then select Save.


