How to use grouping professionally in PowerPoint
Grouping and ungrouping shapes is an important tool in PowerPoint. Using this tool, you can organize your content and make it easier to work with your presentations. .
There are many reasons to use shape grouping and ungrouping in your presentations, for example
- It can help you organize your content more effectively by grouping text, images, and other objects together.
- In addition, grouping allows you to rotate, flip, move, or resize all shapes or elements simultaneously as if they were a single shape or element. You can also change the attributes of all shapes in a group at the same time.
- Furthermore, you can add animations to a group of grouped elements, which helps save time in preparing your presentation. The program also allows you to ungroup a group of shapes at any time and then regroup them later with a single click. .
To see how this works, you can watch Video If you prefer to read, you can skip the video and follow the steps below:
How to create and ungroup shapes in PowerPoint?
First: Grouping shapes or images
1- Select the shapes or images you want to group into one set by clicking the left mouse button while holding down the Ctrl key. Ctrl On the keyboard. .
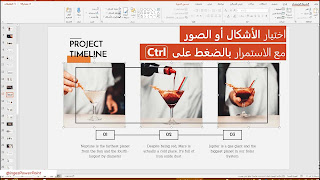
2- Then from the list Coordinate > Select to gather> to gather

3- Now, shapes can be moved or their formatting changed as if they were a single element with ease.

4- The program also provides you with a shortcut method for grouping by right-clicking > Select to gather> to gather
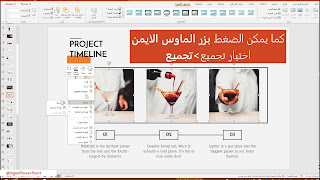
Second: Ungrouping the shapes or images
1- Select the shapes or grouped images that you want to ungroup
2. from the list of Coordinate > Select to gather> Disassembly

4- The program also provides you with a shortcut to unassemble by right-clicking > Select to gather> Disassembly

5- If you need to regroup the items, you can easily do so by right-clicking > to gather>Choice Reassembly